
How to Convert an HTML Template to React, Step by Step
By Manob Editorial ·
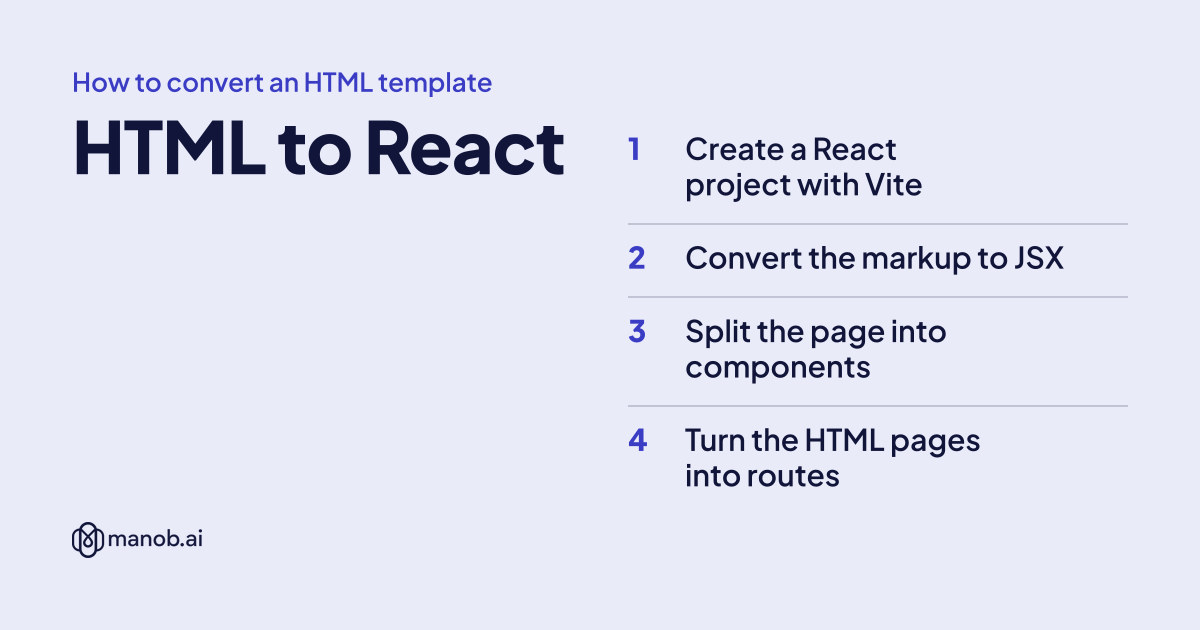
To convert an HTML template to React, create a Vite React project, move the template's CSS and images into src, and paste each page's markup into a component. Fix the JSX differences (className, closed tags, style objects), split repeated sections into components, add React Router for the pages, and rewrite jQuery code as state or effects.
Every code sample below was built and run on October 14, 2026 with Vite 8.3, React 19.3 and React Router 8.4. The example is a small business template with three pages; your file names will differ.
Should you convert it, or buy the React version?
The work grows with every page and plugin in the template, so check two things first.
- Do you need React at all? A brochure site with no logins, filters or live data works fine as plain HTML. React pays off when you need state (carts, dashboards, forms with many steps), shared components across many pages, or you're adding the design to an existing React app.
- Is there already a React version? Some authors sell one design in both formats. These three are on manob.ai as an HTML template and as a Next.js template, and their demos share the same sections. Note that each React version is built on Next.js, not plain Vite.
| Template | Type | Built with | Price from | Live demo |
|---|---|---|---|---|
| Tripura Travel and Tour Booking HTML Template | HTML template | Bootstrap 5 | $28 | Demo |
| Tripura — Travel and Tour Booking Next.js Template | React template | Next.js, React | $29 | Demo |
| Landpagy - Saas & Software Landing Page Bootstrap 5 HTML Template | HTML template | Bootstrap 5 | $24 | Demo |
| Landpagy – SaaS Startup & AI Product Landing Template for Next.js | React template | Next.js, React | $22 | Demo |
| Trendexa - Modern HTML News and Product Review Template | HTML template | — | $30 | Demo |
| Trendexa — Modern Next js News and Product Review Template | Template | Tailwind CSS, Next.js, React | $45 | Demo |
For more, see our React and Next.js template picks. If you're starting from a design file rather than HTML, read Figma to code instead.
Step 1: Create a React project with Vite
Skip Create React App: the React team deprecated it for new apps in February 2025 and points to frameworks or build tools such as Vite. Vite's guide asks for Node.js 20.19+ or 22.12+.
npm create vite@latest my-site -- --template react
cd my-site
npm install
npm install react-router
npm run dev
Then arrange the project like this. Vite bundles the files you import, so the template's CSS and images go under src; public/ is for files that need a fixed URL:
my-site/
├── index.html            Vite's entry page (keep it)
├── public/
│   └── img/              files referenced by URL (favicon, social images)
└── src/
    ├── main.jsx
    ├── App.jsx
    ├── assets/
    │   ├── css/style.css the template's own CSS
    │   └── img/          images used by components and CSS
    ├── components/       Header, Footer, Services, Testimonials, Layout
    └── pages/            Home, About, Contact
Import the template's CSS once in src/main.jsx. Image paths inside that CSS, such as url(../img/hero.jpg), keep working because Vite resolves them relative to the CSS file. If the template uses Bootstrap, install it from npm (npm install bootstrap) instead of copying its files:
import { StrictMode } from 'react'
import { createRoot } from 'react-dom/client'
import { BrowserRouter } from 'react-router'
import 'bootstrap/dist/css/bootstrap.min.css'        // only if the template uses Bootstrap
import 'bootstrap/dist/js/bootstrap.bundle.min.js'
import './assets/css/style.css'
import App from './App.jsx'

createRoot(document.getElementById('root')).render(
  <StrictMode>
    <BrowserRouter basename={import.meta.env.BASE_URL}>
      <App />
    </BrowserRouter>
  </StrictMode>,
)
Step 2: Convert the markup to JSX
JSX looks like HTML but follows JavaScript rules. The React docs list three: return a single root element, close every tag, and use camelCase for most attributes. In practice, these are the changes you'll make most:
| HTML | JSX |
|---|---|
class="nav-links" | className="nav-links" |
<label for="email"> | <label htmlFor="email"> |
<img src="…">, <br>, <input> | <img src="…" />, <br />, <input /> |
style="background-image: url(img/hero.jpg)" | style={{ backgroundImage: `url(${heroImage})` }} |
onclick="toggleMenu()" | onClick={() => setMenuOpen(!menuOpen)} |
tabindex, maxlength, readonly | tabIndex, maxLength, readOnly |
SVG stroke-width, fill-rule | strokeWidth, fillRule |
<!-- comment --> | {/* comment */} |
aria-label, data-bs-toggle | Unchanged: aria-* and data-* keep their dashes |
For long sections, paste the HTML into the HTML to JSX converter that the React docs link to, then read through what it returns. Event handlers and image paths still need fixing by hand.
Step 3: Split the page into components
Anything that appears on every page, or repeats within a page, becomes a component. Here is the template's header, with an inline script toggling the mobile menu:
<header class="site-header">
  <nav class="navbar">
    <a href="index.html" class="logo"><img src="assets/img/logo.svg" alt="Brightline"></a>
    <ul class="nav-links">
      <li><a href="index.html" class="active">Home</a></li>
      <li><a href="about.html">About</a></li>
      <li><a href="contact.html">Contact</a></li>
    </ul>
    <button class="menu-toggle" onclick="toggleMenu()">Menu</button>
  </nav>
</header>
And the same header as a component. The open or closed menu is now state, the logo is imported so Vite bundles it, and NavLink adds the active class to the current page's link, so the template's CSS still applies:
// src/components/Header.jsx
import { useState } from 'react'
import { NavLink, Link } from 'react-router'
import logo from '../assets/img/logo.svg'

export default function Header() {
  const [menuOpen, setMenuOpen] = useState(false)

  return (
    <header className="site-header">
      <nav className="navbar">
        <Link to="/" className="logo">
          <img src={logo} alt="Brightline" />
        </Link>
        <ul className={menuOpen ? 'nav-links open' : 'nav-links'}>
          <li><NavLink to="/" end>Home</NavLink></li>
          <li><NavLink to="/about">About</NavLink></li>
          <li><NavLink to="/contact">Contact</NavLink></li>
        </ul>
        <button className="menu-toggle" onClick={() => setMenuOpen(!menuOpen)}>
          Menu
        </button>
      </nav>
    </header>
  )
}
Repeated blocks, like three service cards, become an array and a map(). Each item needs a stable key:
// src/components/Services.jsx
import designIcon from '../assets/img/icon-design.svg'
import seoIcon from '../assets/img/icon-seo.svg'

const services = [
  { title: 'Web design', text: 'Pages that load fast and read well on phones.', icon: designIcon },
  { title: 'SEO', text: 'Titles and structure that search engines understand.', icon: seoIcon },
]

export default function Services() {
  return (
    <section className="services">
      {services.map((service) => (
        <div className="service-card" key={service.title}>
          <img src={service.icon} alt="" />
          <h3>{service.title}</h3>
          <p>{service.text}</p>
        </div>
      ))}
    </section>
  )
}
Step 4: Turn the HTML pages into routes
Each .html file becomes a page component, and a layout component holds the header and footer that every page shares. Outlet marks where the current page renders:
// src/App.jsx
import { Routes, Route } from 'react-router'
import Layout from './components/Layout.jsx'
import Home from './pages/Home.jsx'
import About from './pages/About.jsx'
import Contact from './pages/Contact.jsx'

export default function App() {
  return (
    <Routes>
      <Route element={<Layout />}>
        <Route path="/" element={<Home />} />
        <Route path="/about" element={<About />} />
        <Route path="/contact" element={<Contact />} />
      </Route>
    </Routes>
  )
}

// src/components/Layout.jsx
import { Outlet } from 'react-router'
import Header from './Header.jsx'
import Footer from './Footer.jsx'

export default function Layout() {
  return (
    <>
      <Header />
      <main><Outlet /></main>
      <Footer />
    </>
  )
}
Change every href="about.html" to <Link to="/about">, so pages switch without a full reload. Keep plain <a> tags for external links.
Each page can set its own title. Since React 19, a <title> rendered inside a component is placed in the document head; render only one at a time. In our build, the browser showed each page's own title:
// src/pages/Home.jsx
import Services from '../components/Services.jsx'
import Testimonials from '../components/Testimonials.jsx'
import heroImage from '../assets/img/hero.jpg'

export default function Home() {
  return (
    <>
      <title>Brightline Studio: Web design in Austin</title>
      <section className="hero" style={{ backgroundImage: `url(${heroImage})` }}>
        <h1>Websites for local businesses</h1>
      </section>
      <Services />
      <Testimonials />
    </>
  )
}
Step 5: Replace the template's JavaScript
Template scripts usually run once on page load and edit the DOM directly. In React, the DOM changes on every render, so that approach breaks. Handle each script one of three ways:
- Small jQuery snippets (menu toggles, tabs, accordions, "back to top"): rewrite them as state, like the header above. Then drop jQuery.
- Plugins (sliders, lightboxes, counters): initialize them in
useEffecton aref, and destroy them in the cleanup function. In development, StrictMode runs effects twice, so the cleanup matters. - Bootstrap components such as dropdowns, collapse, modals and tabs toggled with
data-bs-*attributes keep working after the import in Step 1, because Bootstrap listens for those clicks at the document level. Carousels set to autoplay and scrollspy are started on page load instead, so start them in an effect too, or switch to React-Bootstrap components.
Here's a Swiper slider handled that way, after npm install swiper:
// src/components/Testimonials.jsx
import { useEffect, useRef } from 'react'
import Swiper from 'swiper'
import { Pagination } from 'swiper/modules'
import 'swiper/css'
import 'swiper/css/pagination'

export default function Testimonials() {
  const sliderRef = useRef(null)

  useEffect(() => {
    const swiper = new Swiper(sliderRef.current, {
      modules: [Pagination],
      loop: true,
      pagination: { el: '.swiper-pagination', clickable: true },
    })
    return () => swiper.destroy()
  }, [])

  return (
    <div className="swiper testimonial-slider" ref={sliderRef}>
      <div className="swiper-wrapper">
        <div className="swiper-slide">“They rebuilt our site in two weeks.”</div>
        <div className="swiper-slide">“Clear quotes, no surprises.”</div>
      </div>
      <div className="swiper-pagination"></div>
    </div>
  )
}
Step 6: Make the forms work
A template's contact.php won't run in a React build, which is static files. Keep the form fields in state and send them to a form service or your own API in the submit handler:
// src/pages/Contact.jsx
import { useState } from 'react'

export default function Contact() {
  const [form, setForm] = useState({ email: '', message: '' })
  const [sent, setSent] = useState(false)

  function handleChange(event) {
    setForm({ ...form, [event.target.name]: event.target.value })
  }

  function handleSubmit(event) {
    event.preventDefault()
    // send `form` to your form service or API here
    setSent(true)
  }

  if (sent) return <p>Thanks, we'll reply within one business day.</p>

  return (
    <form className="contact-form" onSubmit={handleSubmit}>
      <label htmlFor="email">Email</label>
      <input type="email" id="email" name="email" value={form.email} onChange={handleChange} required />
      <label htmlFor="message">Message</label>
      <textarea id="message" name="message" rows={4} value={form.message} onChange={handleChange} />
      <button type="submit">Send</button>
    </form>
  )
}
Step 7: Build, check and deploy
npm run build      # writes the site to dist/
npm run preview    # serves dist/ at http://localhost:4173
Click through every page in the preview with the browser console open. The usual leftovers are images that 404 and plugins that weren't initialized. One trap if you'll host under a sub-path such as username.github.io/my-site/: Vite rewrites imported assets and CSS URLs, but a plain string like src="/img/team.jpg" pointing into public/ stays as written. In our build it broke under the sub-path. Write it as src={`${import.meta.env.BASE_URL}img/team.jpg`}.
The dist folder runs on any static host. Our guides cover hosting a React app on GitHub Pages and deploying a website elsewhere.
Can you convert a template you bought?
For your own site or a client's, usually yes, but read the template's license. On manob.ai, a Regular License covers a single end product whose end users aren't charged, an Extended License covers one where they are, and neither allows redistributing the source as-is (license terms). Selling your React conversion as a new template would be redistribution. Demo photos are often for preview only, so replace them before launch.
Need a starting point? Compare HTML5 templates by industry and Bootstrap 5 templates, or browse all site templates, each of which can be previewed before you buy.
Frequently asked questions
Is there a tool that converts HTML to React automatically?
For markup, yes: the HTML to JSX converter the React docs link to handles attributes and closing tags. Splitting the page into components and replacing jQuery scripts is still manual work.
Can I keep using jQuery in a React app?
You can, inside useEffect with a ref and a cleanup, but jQuery and React shouldn't both change the same elements. Most template snippets are shorter as React state.
Should I use Vite or Next.js for a converted template?
Vite is the shorter path for a site that runs fully in the browser and deploys as static files. Choose Next.js if you need server rendering, API routes or the React team's recommended framework setup.
Why are my images broken after converting to React?
Relative paths from the HTML files no longer point at the right place. Import images used in components, keep CSS url() paths relative to the CSS file, and prefix files in public/ with import.meta.env.BASE_URL.
Do I have to convert the whole template at once?
No. Convert the shared layout first (header, footer, global CSS), then one page at a time. Sections you haven't converted yet can stay as plain JSX until you need them as components.